Turner’s blues and a few others

I am currently reading Anthony Bailey’s biography of JMW Turner, Standing in the Sun, (2013 paperback edition). So having just posted about Smalt Blue, I was very interested to read the following lines from Henry Syer Trimmer’s account of Turner’s studio, after Turner’s death, ” … and cobalt to be sure there was, but also several bottles of ultramarine of various depths and smalts of various intensities, of which I think he made great use.” Trimmer goes on to report, “I was told by his housekeeper [Hannah Danby] that ultramarine was employed by him sparingly, and that Smalt and cobalt were his usual blues.” ( pps 87-88).

In this case Trimmer is referring to Turner’s oil paints, rather than his watercolour paints. I am trying to find out whether Turner used the same pigments in his watercolours. It seems quite likely, as it is a matter of selecting the relevant binder for your pigment and ensuring that the particles are ground down to the correct specification that are the key. I need to do some more research!

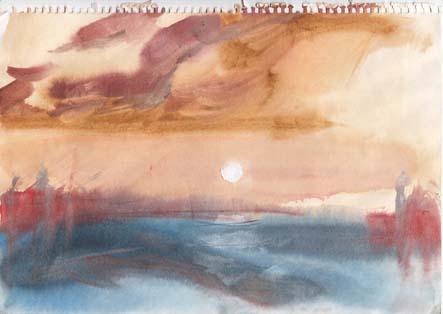
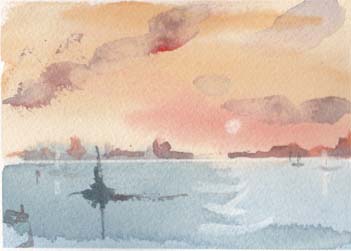
To give you some idea of the colours Trimmer is referring to, above, I have swatched out the three blues referred to, Ultramarine, Smalt Blue and Cobalt Blue, in watercolours. In addition I have also included three other blues, Indanthrone Blue (AKA Delft Blue), Mayan Blue Genuine and Pthalo Blue (green shade) for comparison.

Most interesting of all these pigments to me is Mayan Blue which, according to Wikipedia is “a composite of organic and inorganic constituents, primarily indigo dyes derived from the leaves of añil (Indigofera suffruticosa) plants combined with palygorskite, a natural clay which, mysteriously, is not known to exist in abundant deposits in Mesoamerica.

Indanthrone Blue, PB 60, also goes by more than one name, including Delft Blue and sometimes indigo blue. I would be wary of using the latter common name as the indigo blues I have looked up on line are made from a varying range of pigments. White Nights Indigo (Nevskya Palitra) is a blend of PBk 7, PB 15 and PV 3; Windsor and Newton Indigo is a blend of PBk 6, PV 19 and PB 15.

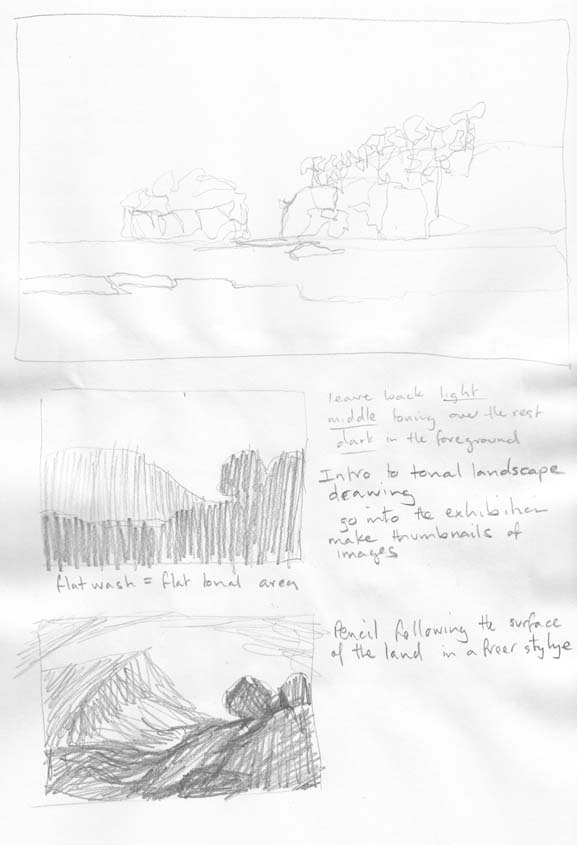
When choosing a watercolour to add to your palette the general advice is to select a paint made from a single pigment. This will generally give better results when mixing colours. If you are selecting a multi-pigment paint you are more likely to mix a muddy colour. This is because some of the pigments may work well in the mix and others may not thereby cancelling each other out and making mud.

Awash with JMW

There are few pleasures in an Australian summer to compare to hanging on the ocean side of the Merewether Baths, watching the waves rolling in over the rock platform, and for an extra frisson enjoying a wave washing up and over the edge of the pool.

Having enjoyed a holiday plungeor two I was reminded of that other aficionado of the seaside Mr JMW Turner. While my efforts are in no way comparable I couldn’t resist a Turneresque title for my simple sketch.

Coal ships off the port of Newcastle – waves breaking over Merewether Ocean Baths, water temperature 20°C, falling tide , 19 January 2018

Turner watercolour workshop, Day 2

Day 2 took off at a similar pace to the first day of the class. Toni started by walking us through some ways of making sketches. According to Turner’s contemporaries Turner carried a rolled up sketchbook in his pocket and drew with his pencil as if writing. By leaving the pencil on the surface of the paper the pencil moves easily over the paper and delicate lines can be drawn, which may readily be painted over later. You can draw this way quite quickly and if you have the time additional detail can be added. Another method, even quicker still, is to do a ‘thumbnail’ sketch just getting the most basic shapes in, using the lightest tones at the back and darkest tones at the front. Here is my sample of these two approaches. The top sketch formed the idea for the first colour work below.

Two sketching techniques. The top a pencil moves quickly and lightly over the surface. The lower two are fast thumbnail sketches.

Two sketching techniques. The top a pencil moves quickly and lightly over the surface. The lower two are fast thumbnail sketches.

Turner was able to do 10 to 15 sketches in the time he could do one colour study. If you look at Turner’s sketchbooks you can see the numerous quick sketches that he he made while traveling by carriage through Europe. Once he was settled into his overnight accommodation Turner could then add colour to these studies or further work up his sketches or colour studies.

Toni then demonstrated how to use normal cartridge paper for watercolour studies without having to tape the paper down. The way you do this is to wet both sides of your cartridge paper and place it on a smooth surface, such as a piece of glass or plastic and then the cohesion of the water molecules will hold it in place. Of course you do need to work wet into wet using this approach.

cartridge paper wet of wet technique

Cartridge paper wet of wet technique. The darker lines are made using the end of my brush and the ‘lifted’ area in the upper right is made by flicking my fingernail up the wet paint.

I was really happy with this as a way of doing quick studies. Here is another one.

Waterscape on cartridge paper

Waterscape on cartridge paper

The main drawback with using cartridge paper is that you are pretty limited with the sort of ‘lifting’ techniques you can use. Wiping with a tissue works, but the creating the sun in the image above actually tore into the paper.

After lunch we had a lecture by Dr Joyce Townsend on Turner’s materials. I think that the most amazing aspect of her talk was her obvious delight at being able to actually use Turner’s original pigments, that were left in his studio at his death (part of the Turner Bequest), to paint samples demonstrating the colours he used.

Turner's studio materials: madders of different shades,  on 19th century Whatman paper, painted by Joyce Townsend.

Turner’s studio materials: madders of different shades, on 19th century Whatman paper, painted by Joyce Townsend.

It was then up to us to bring together what we had learned to develop a final work on BFK Rives paper. While this paper is made as a printmaking paper Toni said he had found it to be the best paper to allow working, re-working and lifting techniques including scraping with a knife. Here is my final piece.

Watercolour on BFK Rives paper 31 July 2013

Watercolour on BFK Rives paper 31 July 2013

From my perspective, the quick sketching and fast ways to work up colour studies are the main things I have taken from this workshop. That and the need to get out and apply what I’ve learned over these two days.

Turner watercolour workshop, Day 1

I’ve had a wonderful two days this week doing a watercolour workshop at the National Gallery of Australia on  JMW Turner – learning from the master. The course was held as part of the Turner from the Tate exhibition. Our tutor was Tony Smibert, who is a Tate Gallery Visiting Artistic Researcher. Toni’s area of interest is watercolours and he has worked closely over the years with Dr Joyce Townsend who is the leading specialist on Turner’s materials (paint, paper, tools etc).

Toni Smibert demonstrating JMW Turner's watercolour techniques

Toni Smibert demonstrating JMW Turner’s watercolour techniques

We set off at a fast pace as Toni discussed and demonstrated the methods that Turner used. Turner’s work uses many basic concepts, such as the relationship between warm and cool colours and light and dark contrast. We worked on small areas, dividing up sheets of Arches watercolour paper, to record methods and processes. Toni suggests repeating these exercises, making many small works so these techniques become ingrained. This is not so you develop slavish copying but to help you get to the point where you can intuitively use the techniques as and when it applies to your own work. Like Toni said doing the exercise once won’t teach you the method.

Day 1, my sample page

Day 1, my sample page

Simple design structures such as a washes of warm colour above a wash of cool colour, suggesting sky over water, or the reverse suggesting sky over land were explored. With a bit of guidance we were able to readily produce a convincing waterscape.

A waterscape using a warm wash above a cool wash.

A waterscape using a warm wash above a cool wash.

We then explored ideas such as dropping cool colours into a warm background:

Cool colours into a warm background - the basis for Turner's "Blue Rigi"

My sample of cool colours into a warm background
– the basis for Turner’s “Blue Rigi

and warm colours into a cool background to develop landscapes. This flows from another method which is ‘finding the landscape’ in the paint. Basic structures can be worked and re-worked to develop a final image.

My sample of warm colours into a cool background

My sample of warm colours into a cool background – similar to Turner’s approach to a “Study for the Red Rigi

It was a very full day. At the end of our class we went into the exhibition so Toni could show us some specific examples of Turner’s techniques and demonstrate some approaches to doing quick sketches. What a luxury to have the originals to study so closely.

Turner from the Tate

While in Adelaide I saw the Turner from the Tate  exhibition at the Art Gallery of South Australia, closing 19 May. This exhibition will open in Canberra at the National Gallery of Australia on 1 June.

The visitors numbers were reasonable so we were able to have a really good look at the works. Much to my surprise you were allowed to take photos in the exhibition as long as you didn’t use a flash (don’t expect such liberties in Canberra). Here is Turner’s paint box.

Turner's paintbox - pigs bladders for carrying mixed pigments at the top of the box and jars of ground pigment at the front

Turner’s paintbox – pigs bladders for carrying mixed pigments at the top of the box and jars of ground pigment at the front

The rounded shapes at the top are the pigs bladders in which the mixed pigments were carried.

What I really enjoyed about this exhibition was the number of studies and sketches that were included. I am intrigued by the Turner’s process, particularly his watercolours. Some of were titlted “A Beginning” and were colour studies or pieces left almost as soon as they were started.

A close -up of one of One of  Turner's colour studies, Blue moonlight over yellow sands, c 1824

A close -up of one of One of Turner’s colour studies, Blue moonlight over yellow sands, c 1824

If you want to see more of this type of work the Tate Gallery (holders of the Turner Bequest) have digitised Turner’s sketchbooks. If you look at the Turner’s Finberg sketchbook  you will see many colour studies which to our contemporary eyes look like abstract works. In these works there is only an occasional figure or recognisable shape emerging from the picture. No wonder Turner’s contemporaries had trouble understanding these works.

Whenever I go to an exhibition I like to  play the game of  “if I could take one piece from this exhibition …” . For this exhibition my number one pick would be this triple seascape study, Three Seascapes, c 1827. What is interesting is that the painting also works when it is turned upside down. The dark section at the top becomes the land and the centre section’s sea and sky for become reversed for the lower section of the work. I wonder did Mark Rothko ever see this work?

Turner’s Triple Seascape, c 1827

Turner's Triple Seascape turn upside down

Turner’s Triple Seascape turned upside down

The works in the exhibition are drawn from the Turner Bequest to the Tate Gallery. If you want to see more the Tate has digitised the bequest so you can look at your leisure, that is as long as you have plenty of  time to look (when I checked it showed over 2,000 pages of work)!