Paint marker practice

Yes I have gone out and bought myself several more paint markers. I’m pretty much sticking to the tried and true colours, including a cadmium yellow, cerulean blue and yellow oxide. I’ve also selected a bright green, a lighter blue and two greys.

Liquitex paint markers, testing for colour and opacity.

Liquitex paint markers, testing for colour and opacity.

The two colour patches were done using wet over dry and as you can see these colours are quite opaque. There are several colours in the range which are transparent but I haven’t tried any of those yet. The other aspect I like about these markers is that they are very quick drying. So that is a plus for my sketching.

I thought I’d better try the colours out in a ‘real’ drawing, so I did the following sketch of my stainless steel teapot, sitting on a table outside.

Teapot using Liquitex paint markers and ink, 18 March 2014.

Teapot painted using Liquitex paint markers and ink, 18 March 2014.

I don’t plan to use so much colour in my regular sketches, but I’m pleased with how they worked in this quick sketch.

I see red

These drawings contain evidence of my even newer, newest art ‘toy’, paint markers. I am testing a Liquitex Paint Marker, which is a water-based acrylic paint in a marker-style tube. I have the smaller nib version 2-4 mm, but a larger 8-15mm is also available.

It started like this. I dropped by the art supply shop, just before lunchtime on Friday and as I was the only customer there I took the opportunity to ask the staff to give me their views on the range of marker pens that have become so popular lately, particularly for cartooning and graphic art. I haven’t used a felt pen since primary school and at a general starting price of about $10 per pen it’s not the sort of thing I’m going to buy to try ‘on spec’ (‘speculation’ for the non-Aussies out there). I was pleased that I struck two knowledgeable people who could walk me through what was on offer. One of them suggested that apart from the Copic type of marker I should also consider paint markers. Even better, the supplier had given them a whole stack of these pens to test. So they sent me home with my own cadmium red paint marker to play with.

En route I dropped in to the local mall, where I spotted just the right type of sign – red!

In the Mall, ink and paint marker, 14 March 2014.

In the Mall, ink and paint marker, 14 March 2014.

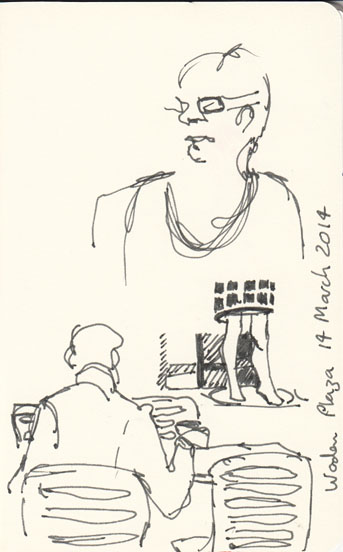
I did also manage to get in a practice sketch of a some people, without even using the marker pen.

People studies, ink, 14 March 2014.

People studies, ink, 14 March 2014.

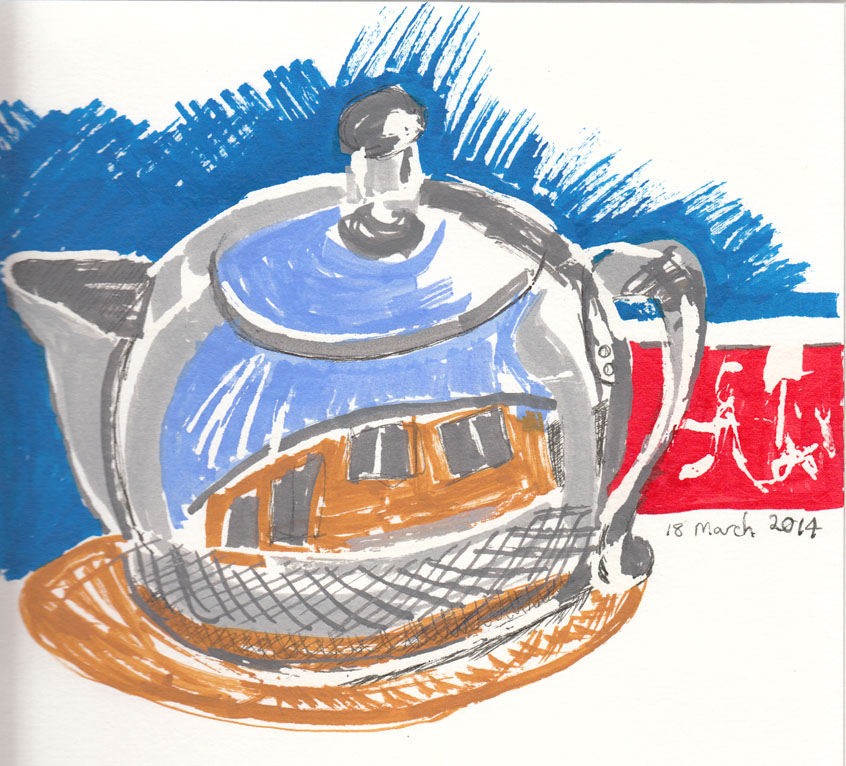
Today I had another chance to use it. Our favourite bakery cafe has been re-decorated, as has the wall on the other side of the road.

Graffiti outside the cafe, ink, pencil  and paint marker, 15 March 2014.

Graffiti outside the cafe, ink, pencil and paint marker, 15 March 2014.

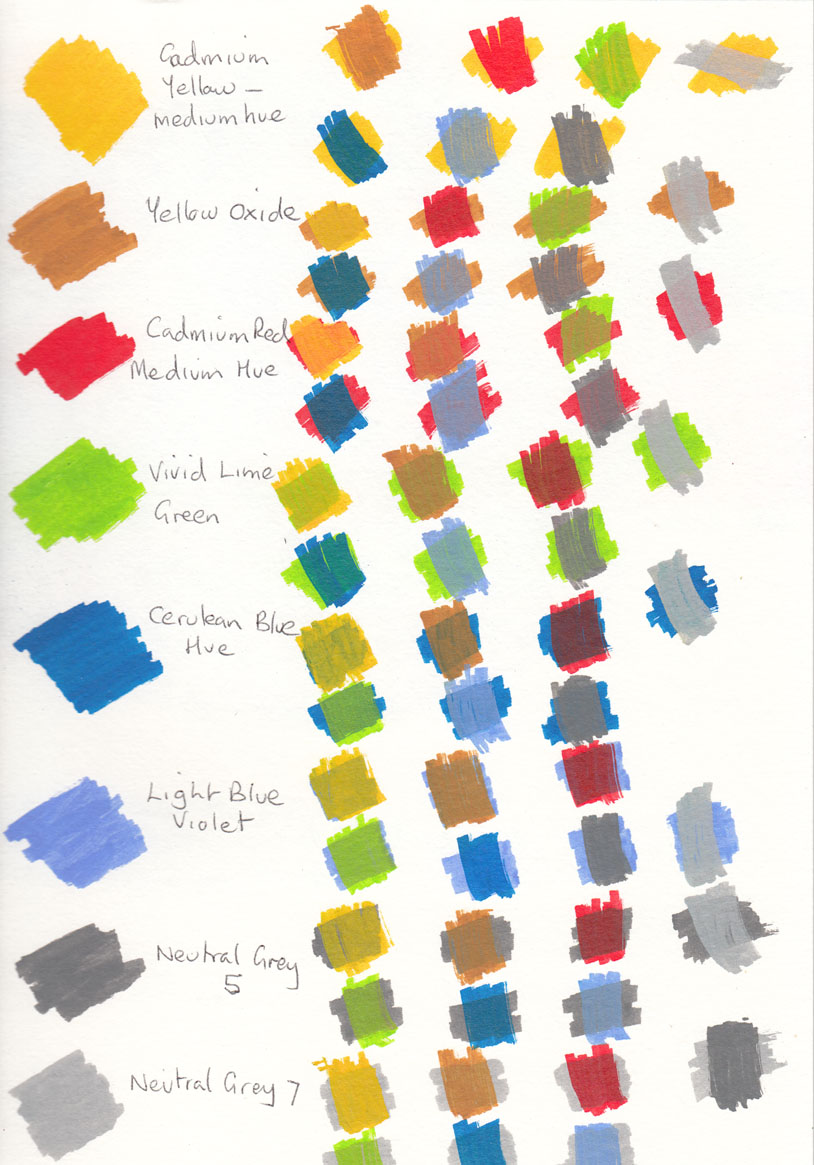
The paint marker has a chisel point so it can make quite fine lines as well as thicker marks. It will also give good flat coverage, should you want to do that as well. There are 50 colours available and packets of replacement nibs can also be purchased. My thinking is that I would like get a few colours, and one or two greys, based on what I normally paint with, in the smaller tubes so I can add them to my ‘field’ sketch kit. The bigger tubes are just way too jumbo-sized to consider taking them with my regular sketching setup.

Has anyone else used these paint markers? I’d be interested in your thoughts. I see from their website that Liquitex has been offering a free sample to European and American customers, although UK, US and Canadian requests have apparently outstripped currently available supplies. Anyway keep an eye out for them or ask if your local art shop has some samples you can try.

More play

Recently I was given a Moleskine Sketchbook, nice gift. I have used their watercolour books before, I lashed out and bought some when I did an overseas trip, but the sketchbook was new to me. Time to put it through it’s paces. I decided to use my fountain pen with black ink and then try some watercolour washes.

OK, I was rather surprised to see my black ink get sucked into the page so that there was only a medium grey colour left behind. Not promising. Then the watercolour wash ‘beaded’, very finely, on the paper with as much paper exposed as covered. My ink isn’t permanent so there was quite a bit of ‘running’. I wasn’t too happy. But then I looked at the page as it dried and decided it wasn’t so bad after all – I’m referring to the top half of the image below. I quite like the way the watercolour and ink has worked on the red backpack.

Ink and watercolour on Moleskine sketchbook.

Ink and watercolour on Moleskine sketchbook.

I then tried reversing my approach, laying down some washes and a bit of watercolour sketching. The teapot on the left was far more subtle than I expected. I discovered that I could draw back into the wash, after it had dried a bit and the ink remained a lot darker. As you can see the ink didn’t bleed even though the paper remained somewhat damp.

I’ve also done more drawings on the back of this page using washes and I’m really pleased to see that there is no bleeding from one side to the other. I did leave the page to dry out a bit between drawings. The washes dried reasonably quickly, enough for me to be convinced I could get a rapid sketch with washes done and still have it dry enough to close the book up after only a few minutes drying time.

The main drawback for me to effectively use this journal remains the ink. Given that I like to make notes to go with my sketches using this fountain pen with the current type of ink clearly isn’t going to be too successful. Particularly if I want my notes to remain visible. I did see that Moleskine has a rollerball pen that can be clipped for easy carriage onto the sketchbook, but at just under $20 for the pen and $5 each for the refills I think I’ll pass on the “innovative rectangular design” that is “fashioned to specifically compliment the shape and personality of a Moleskine journal”, for a more rudimentary ball point pen!

Fashioned specifically to compliment the shape and personality of a Moleskine journal, the innovative rectangular design feels nice in the hand and lies flat. – See more at: http://www.eckersleys.com.au/products/moleskine-roller-pen#sthash.syJInMZE.dpuf

Just testing

If I’ve learned one thing since joining the world of on-line drawing, urban sketchers and other sundry artists, is that there are many different techniques out there to apply to any scene or subject matter. I haven’t been doing many watercolours recently, so I’ve decided it is time to do some more exploration.

Watercolour over wax crayon.

Watercolour over wax crayon.

I dropped by my local library the other day and selected two watercolour books from what was on offer. I was looking for something to suggest some new techniques or find some different ways of working. One of the books I picked up was Shirley Trevena’s Taking Risks With Watercolour. While I’m not particularly interested in  step by step painting guide, Trevena’s book takes you through both her techniques and her thinking behind the preparation of one particular work. Her strong colours, use of layering and interesting compositions were enough to get my interest. The other book, Travels with Watercolour by Lucy Willis, I have yet to get fully into, but almost immediately I found some ideas that I could readily apply.

So today was the day. What I was focusing on was masking and wax crayons to help indicate layers and complex shapes. My subject matter was a green plastic sieve with some figs inside it. Willis had suggested using a wax crayon to draw a complex shape which colour could be washed over, rather than the more common way of painting in the negative shapes and leaving the white of the paper to indicate the shape. Trevena uses masking fluid, among many other techniques, to reserve space and allow for complex pattern detail to be worked into a painting. She suggests using the fluid with a fine nozzled bottle to allow for more linear definition (obviously the nozzle on my bottle wasn’t quite what it could have been).

Early stages of resists on watercolour paper.

Early stages of resists on watercolour paper.

The photo above shows the first stage of both techniques. The top is the wax resist and the bottom is the masking fluid. I then applied some washes over them, keeping in mind how the light was falling on the bowl but not necessarily taking into account the actual colour behind the bowl.

Wax and masking fluid resist with added washes.

Wax and masking fluid resist with added washes.

Having removed the masking fluid on the bottom image I then went back in with some watercolour pencil to add extra colour. Some other suggestions from Trevena, were to use a stick to drag colour from one area to suggest detail, in this case the purple colour of the base of the fig into the lighter green of the upper part of the fruit.

Drawing colour up from wet paint with a stick and a pleasing passage of wash over wax crayon.

Drawing colour up from wet paint with a stick and a pleasing passage of wash over wax crayon.

I’m pretty pleased with these initial explorations and plan to keep working with these ideas and several others suggested by both artists.

Music at the Markets

I’ve done very little drawing this week. I’ve had to focus on finalising exhibition proposals. Trading drawing for writing and trying to bash some plain English, as opposed to art speak, into my words. I’ll let you know how I go.

Relief came on Friday as we took an hour at lunch to drop by the Fyshwick Markets where there was an ‘apple and pear week’ promotion, which included a tasting of some interesting ciders. Oooh arghh, oooh arghh, I hear you say! To add to the atmosphere two guitarists were playing some very easy sounding jazz – not that we needed encouragement to sample the ciders on offer.

Jazz guitar at the Fyshwick markets, 7 March 2014.

Jazz guitar at the Fyshwick markets, 7 March 2014.

I clearly didn’t realise the effect the cider was having on me until I scanned the image below and noticed that I’d managed to get both the wrong day and month on the drawing!

7Mar2014b

Jazz guitar and some listings of what was on offer on the day. (For the record I recommend Willie Smiths Organic Cider and the Hillbilly Crushed Pear).